Today while chatting at Wood Talk Online, I came across the Panofish Blog. There were so many awesome projects and videos, I had to pick one and share it with you. Enjoy! I used 3dsmax to model my deck and shed. I recently converted the 3D deck & shed plans into sketchup so that others can benefit.
Feel free to download the sketchup file and use Google Sketchup to view, measure, and modify my shed/deck plan for your own use.
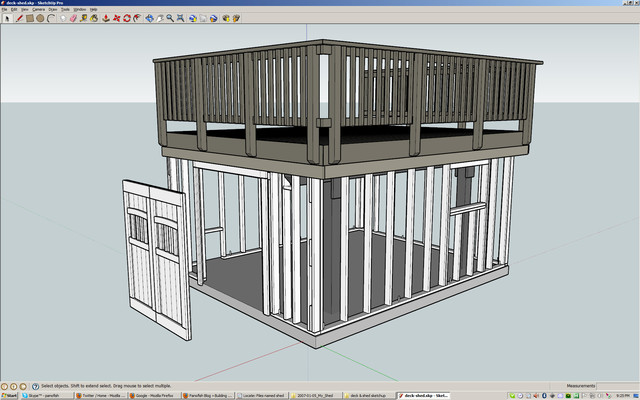
FRE Google Sketchup Plans for my deck and shed.
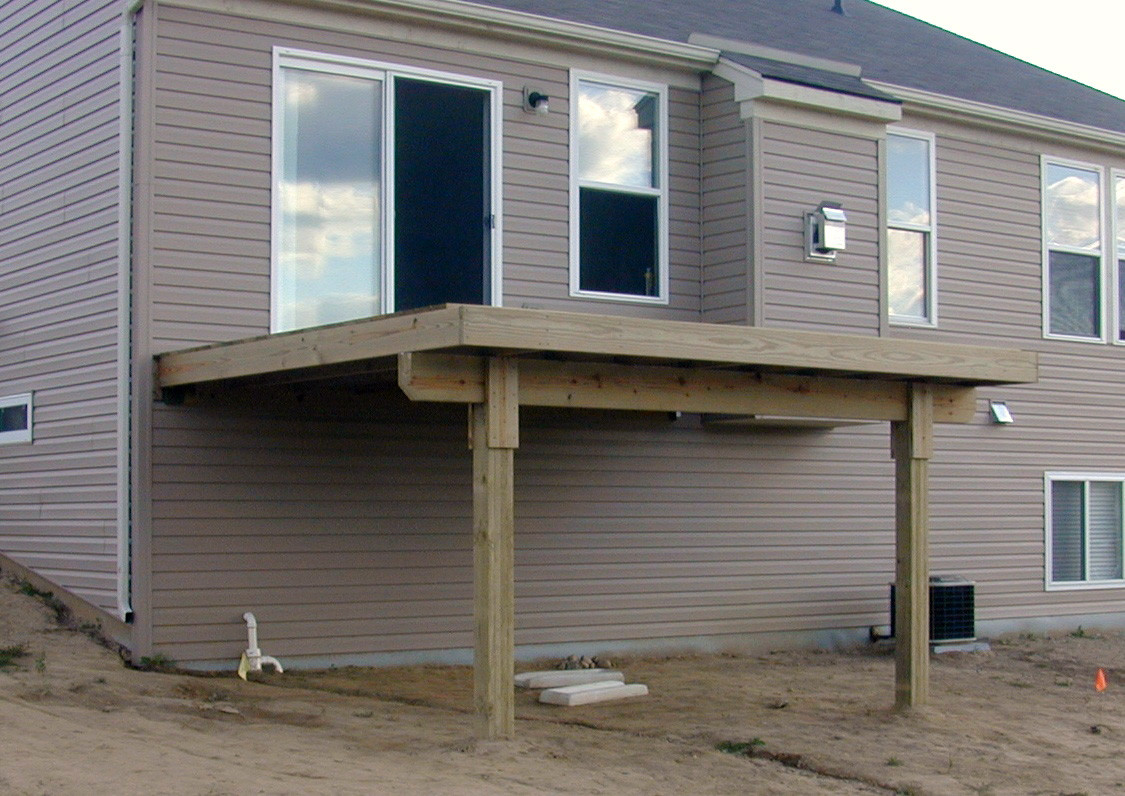
Back in 2001 my new home needed a deck. I designed a deck that was small and simple. The 2 posts and single beam were massive screwed and glued planks. I am proud of the fact that I single handedly designed and built my deck. It was a lot of fun figuring out how to lift that heavy, wet, pressure-treated beam onto the posts all by myself. The posts weren’t small either, when you consider they are almost 6 feet underground! Overkill should be my new middle name.
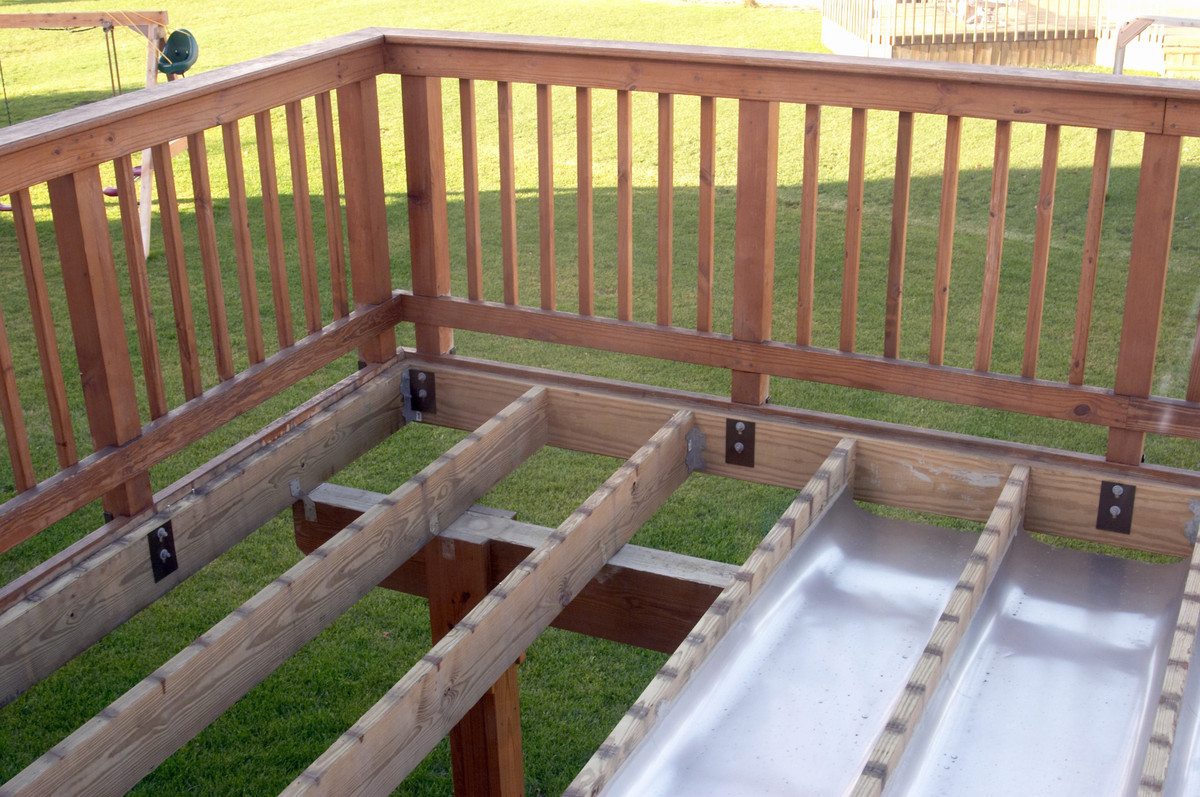
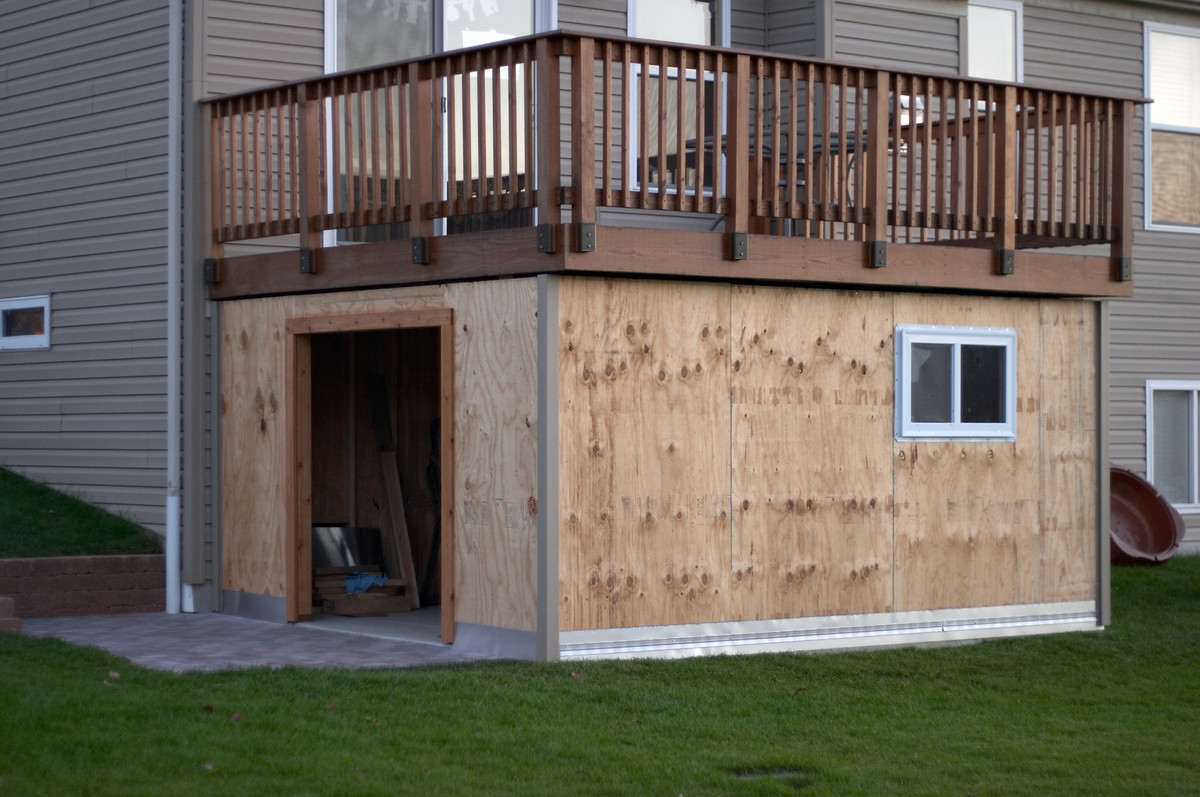
Designing my deck with only 2 posts, allowed plenty of space for a shed. The first stage of building my shed was to build the roof within the joists of the deck. This stage took a long time and a bunch of thought. I decided to build an angled trough system with curved sheets of aluminum flashing.
Here you can see the underside and the gradual slope for rain runoff.
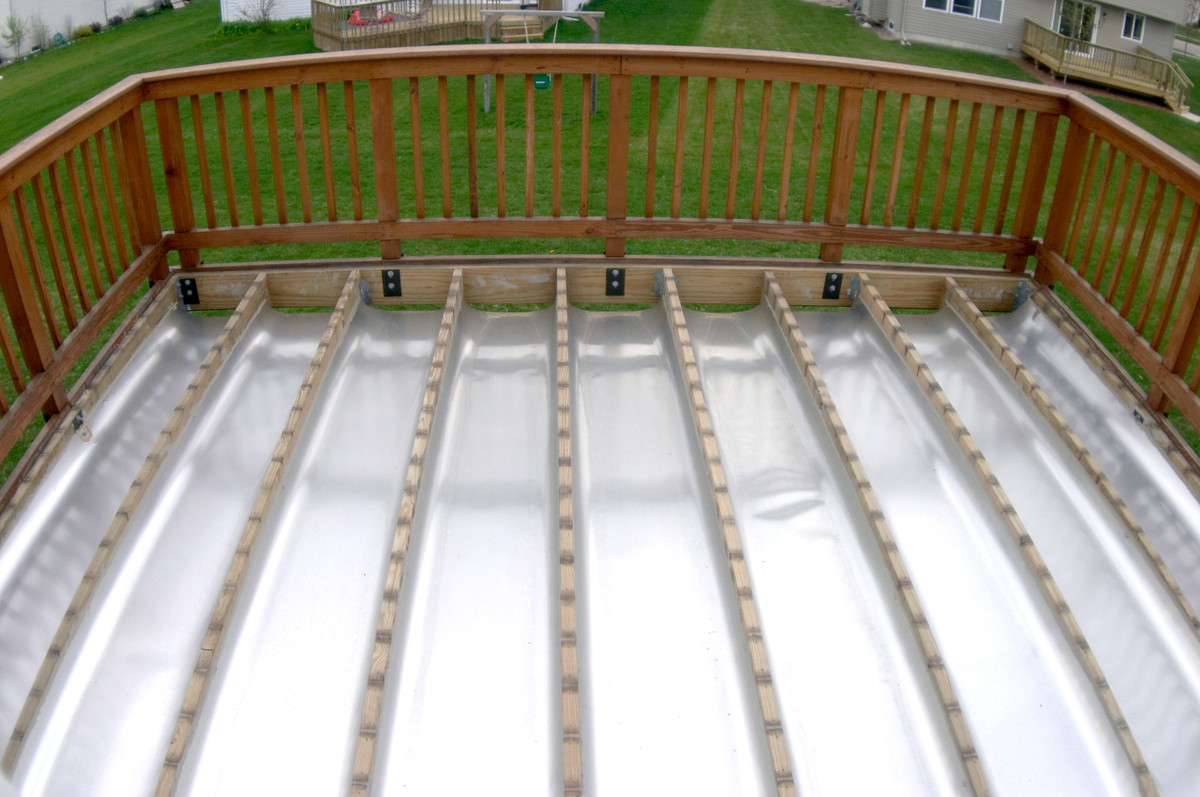
This was an incredibly tedious process. I used a large quantity of industrial caulk to seal the aluminum to the joists. This tedium will be worth it because it maximizes my sheds headroom. I’m 6′ 3″ and there is just 1″ of headroom from the joists.
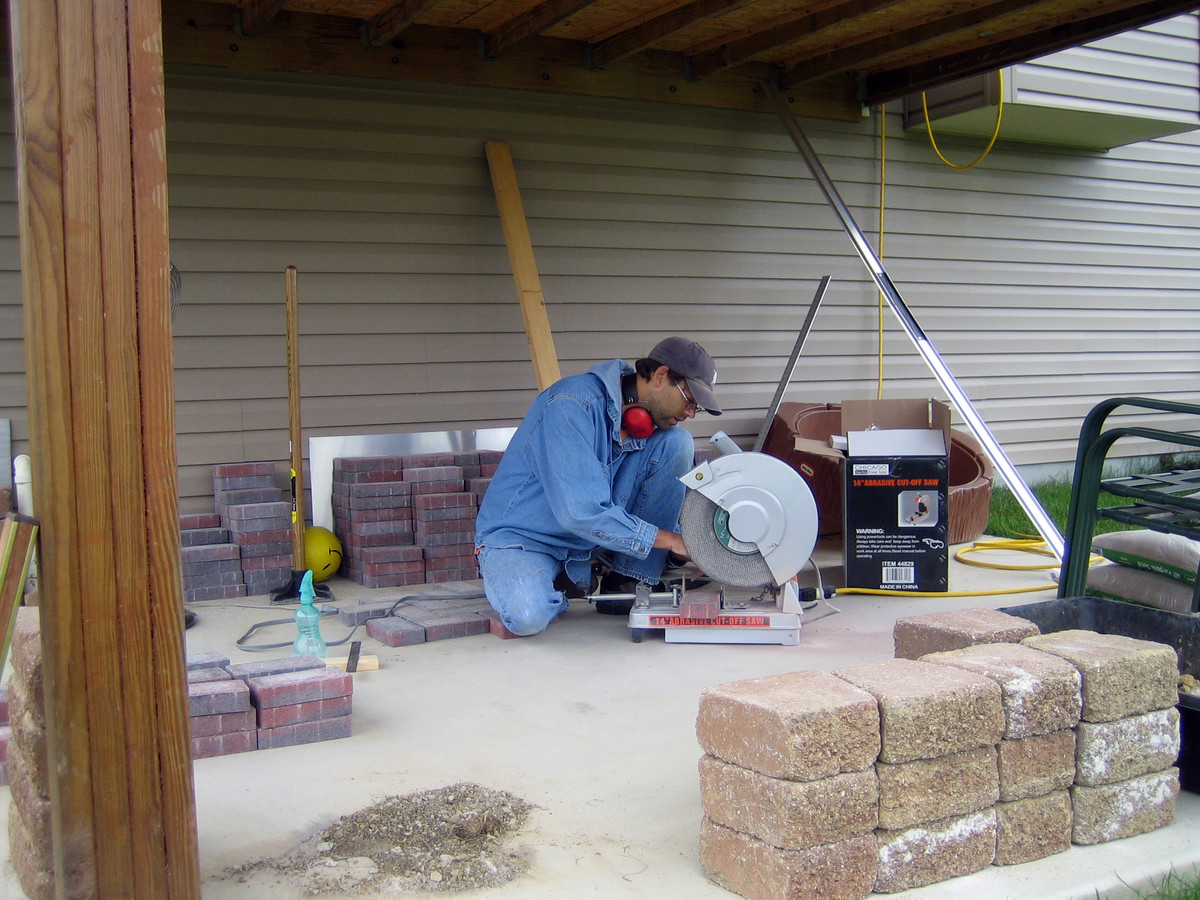
The next time I need to cut bricks… I’ll get a diamond blade. It sure took me a long time to cut them with an abrasive disc.
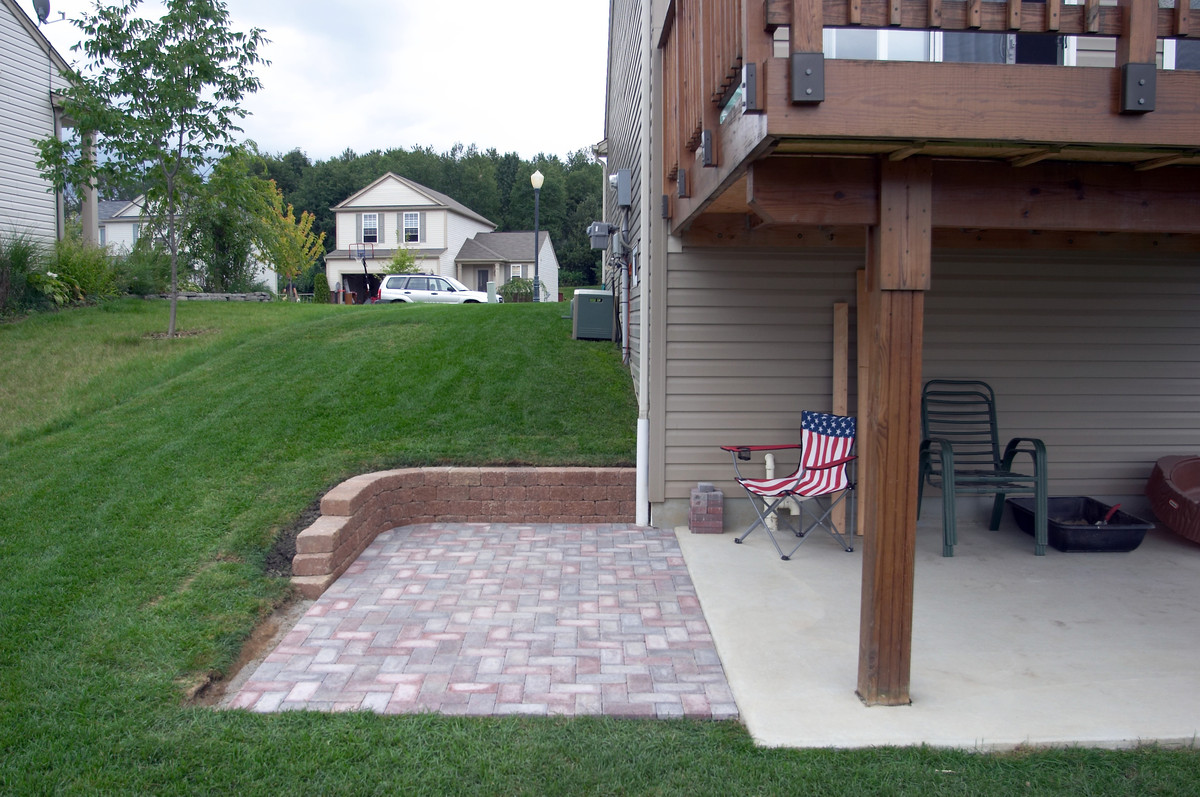
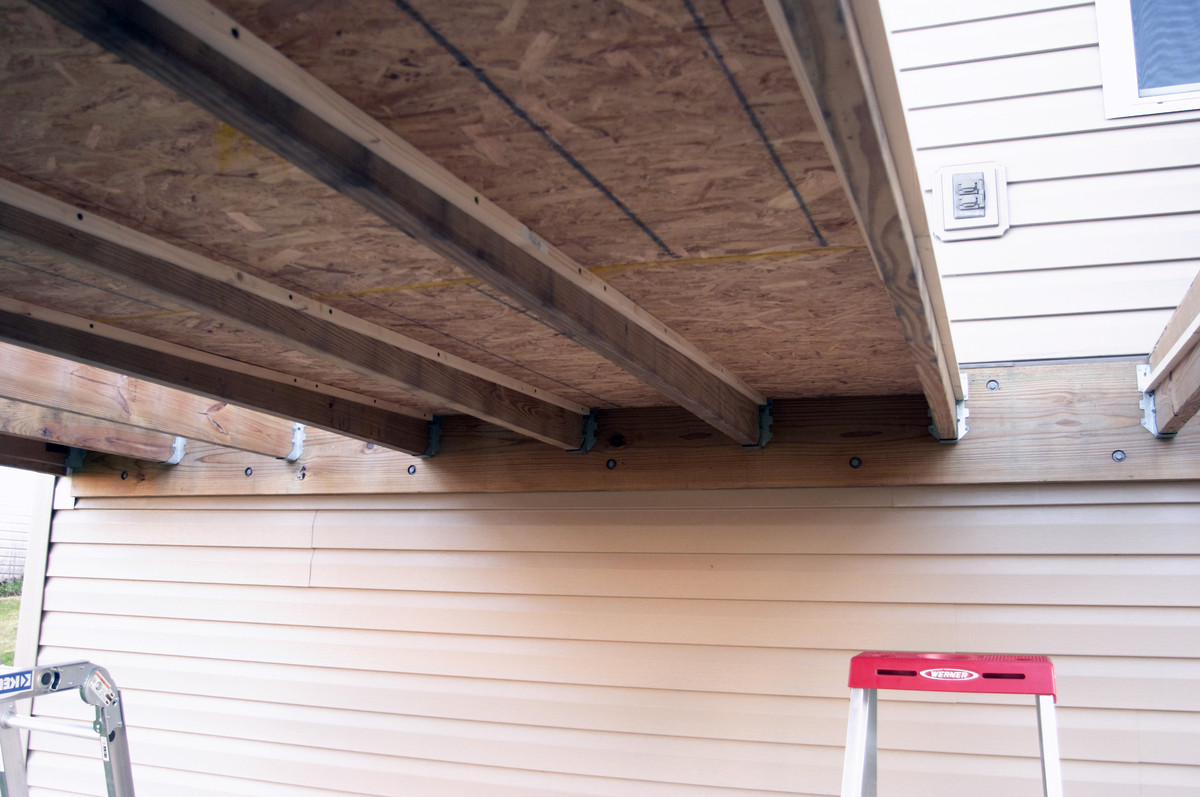
The shed roof survived the winter and showed no leaks. Now the next stage. I had a concrete pad poured. I decided to put my shed entry on the left side of the deck, so I had to dig the hillside down and create a patio for the doorway. This summer was incredibly hot and moving my sprinkler lines was no fun.
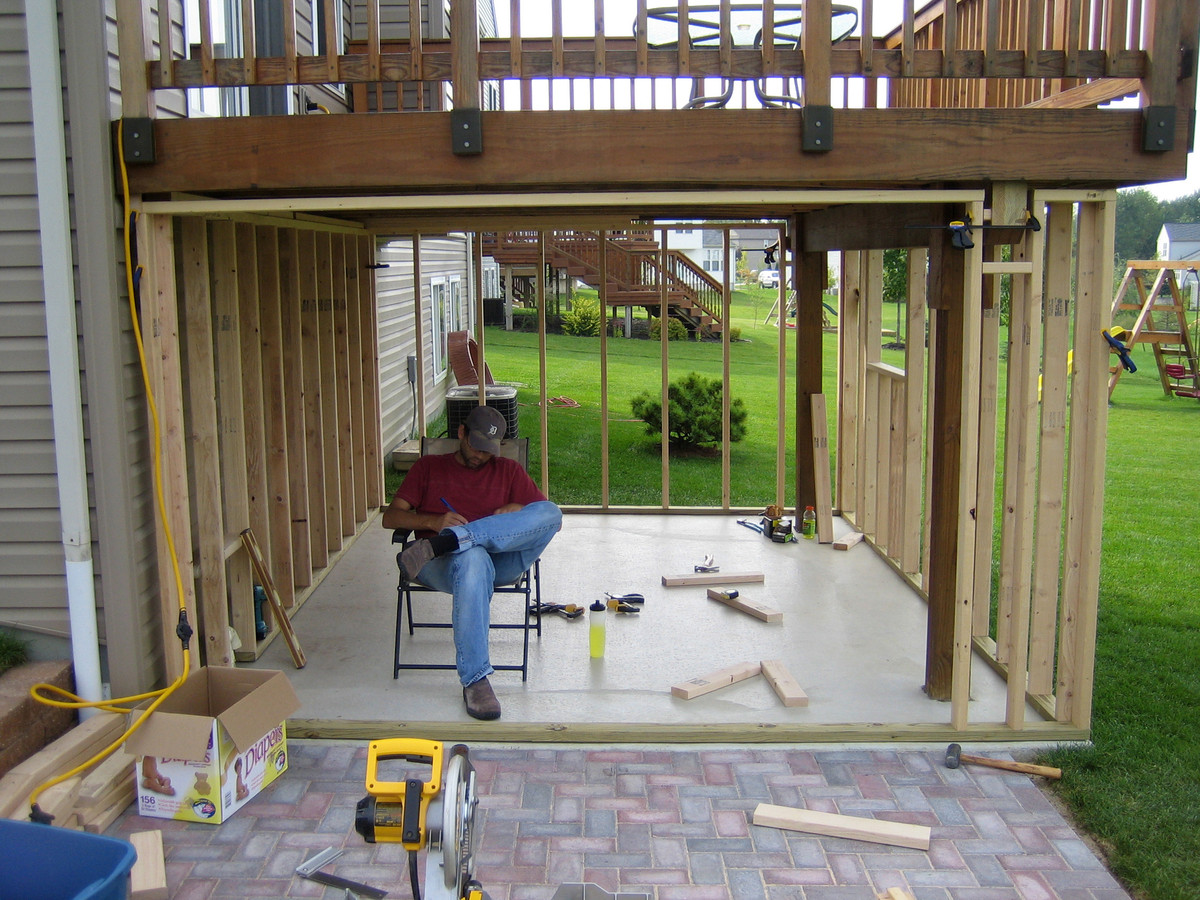
It’s took an eternity to figure out how to build the walls. I had to leave a gap between the walls and the deck. I expected the concrete to heave in the winter.
My excitement is building and I can see the light at the end of the tunnel!
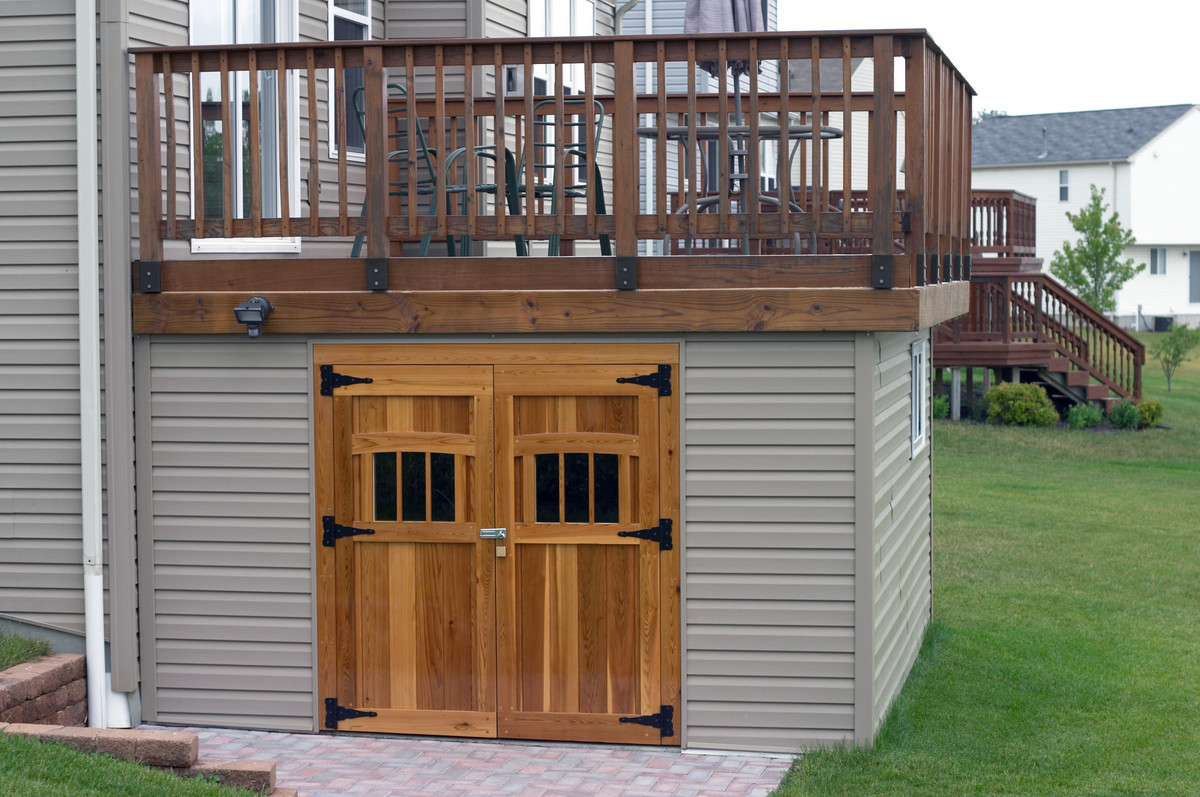
The doorway is short and non-standard. I had to build a custom double door. Another month or so would pass before I could finish my custom shed doors, but I’m happy with the result. I wanted my shed to look as nice as I could make it… so I wrapped it in matching vinyl siding. My trailer-lift project may have been my most gratifying project, but my shed has been the most useful. Good thing I allowed space for the concrete to heave in winter… because it did just that!
YAAA! My garage is clean and useable again. Do you have a project or blog you’d like to share with us?? Please let me know here!.
CustomMade
Latest posts by CustomMade (see all)
- LEEDing the Way - August 3, 2015
- Pollution Revolution - July 29, 2015
- 24 Eco-Friendly, DIY Wedding Ideas - July 27, 2015