Solid 6/4 Red Oak Rustic Confrence Table


We often get inquires at R. J. Hoppe Inc. regarding solid wood tables. I thought this might be a good opportunity to document just what is involved in creating a "simple" table top. First off this project was generated through the Custom Made web site. A business owner had recently moved into a new space and required a conference room table. The base for the table was provided by him. The owner saw my company profile on Custom Made and decided to drop by. We discussed and narrowed down the myriad of options and settled on Red Oak as the wood species for the project. We also agreed upon a price. The project was born.
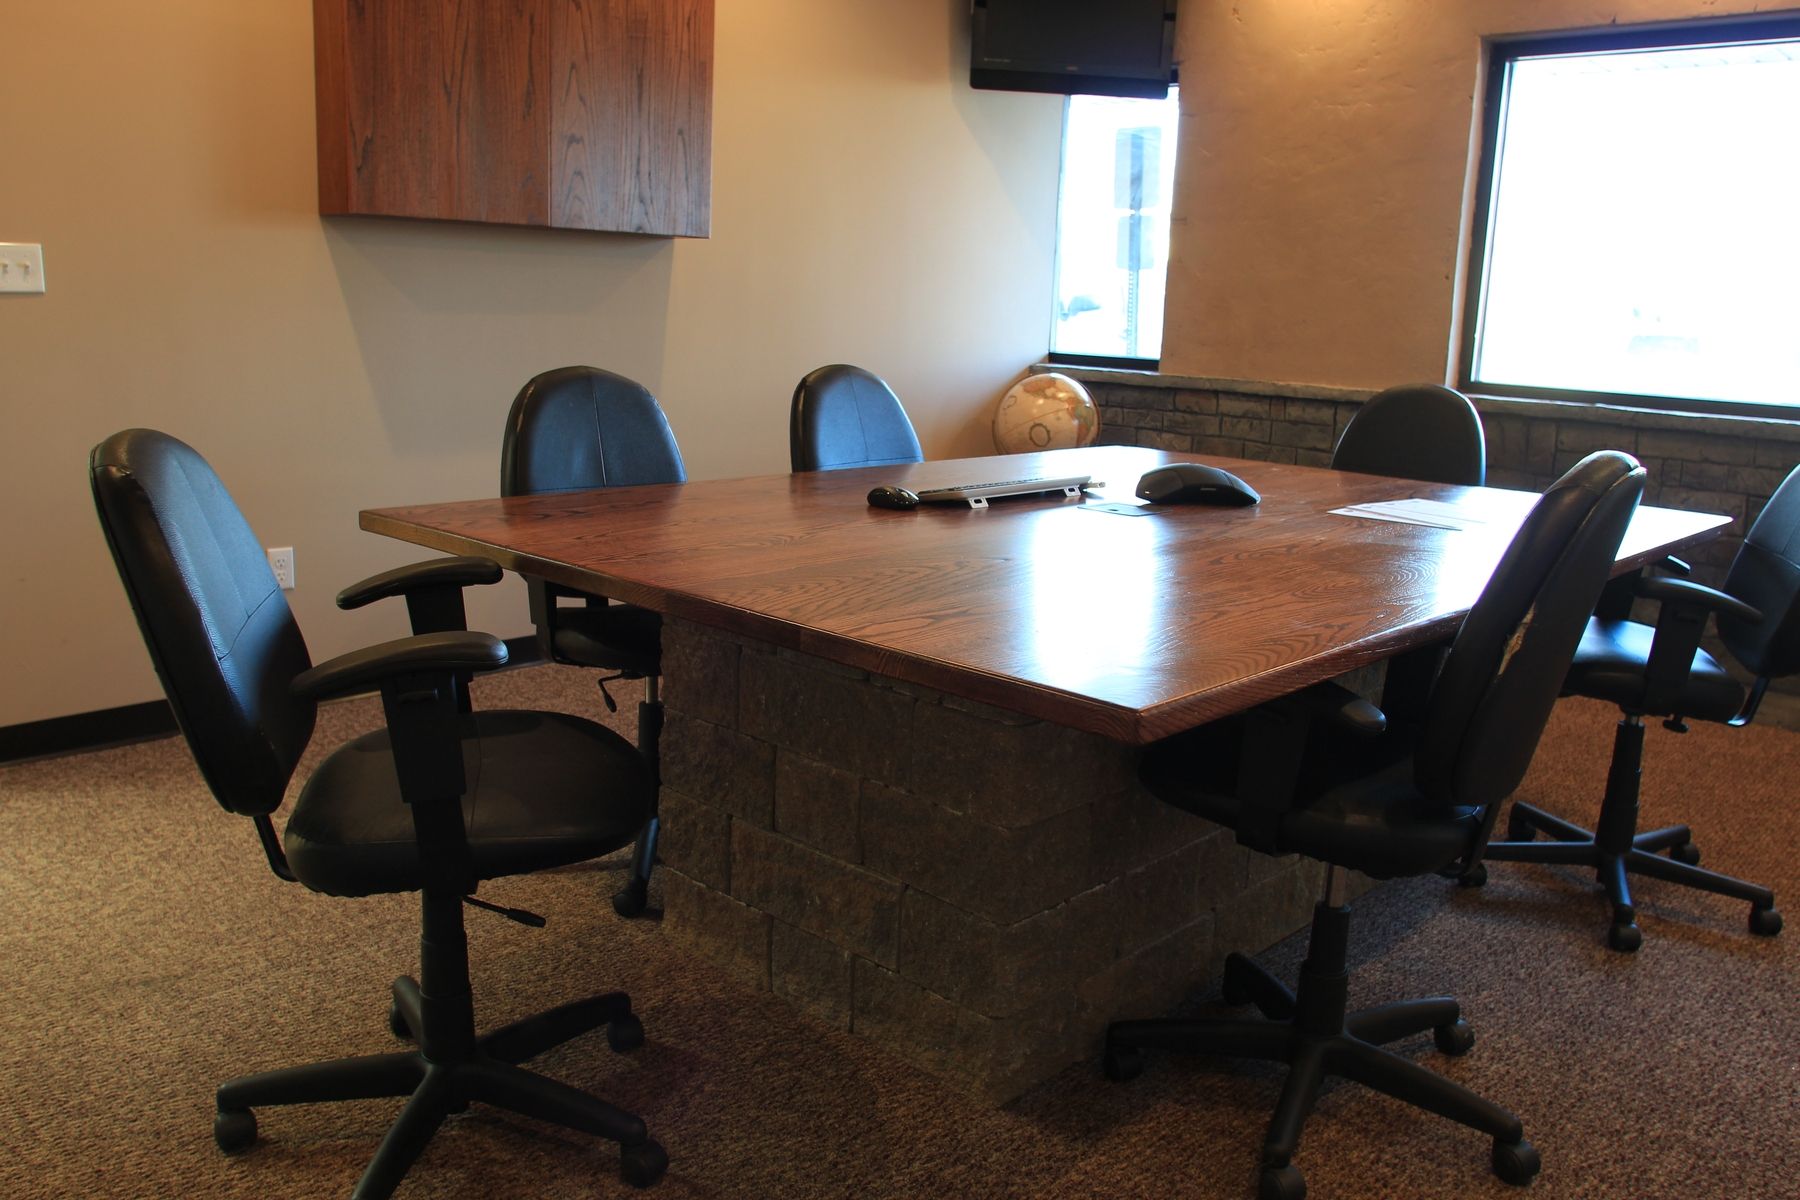
The first picture shows the completed table top with two coats of Chemcraft low gloss post catalyzed lacquer. The second picture shows a detail of the wood grain as well as some of the distress the client had requested.
The third picture really shows the beginning of the process. Rough sawn, 8/4 solid Red Oak was purchase and needed to be dressed down to 6/4 (1 ½") thick. This was done by means of a massive, ancient planner we have in our shop.
The fourth picture illustrates a number of steps. After planning the boards needed to be calibrated to a uniform thickness. The planner wasn't good enough for this. You can see our drum sander in the background of the picture. After calibration the boards were laid out and marked to achieve the best look possible. Then it was off to our Ayen doweling machine. We find that using ½" x 3" dowels works best for mechanically joining the individual boards together. Hence, the reason we calibrated the boards served two purposes: 1) To bring out the best grain possible in the wood and 2) to calibrate the wood for doweling.
The fifth and sixth picture show the individual boards glued up. Note the 4 x 4 bracing on the top surface. This is done to keep the entire top for bowing while the glue cures.
The seventh picture illustrates a cut out made for a power and data grommet which would later be installed. We always prefer to have the actual grommet in house so we can test it's fit and function. You can just make out one of the dowels used in joining the wood.
Before final sanding we like to give solid wood items, such as this, a bath. The eighth picture shows this. Why? The water raises the grain and allows for better finishing after sanding. Prior to this though, the customer requested a slight level of distress in the final product. So after taking out all undesirable defects with our drum sander, we put them back in the end. This is simply about control of the look. Any amount of distress can be reintroduced into the boards, after, we make sure the top is mechanically sound and glued up properly.
The ninth and tenth picture shows the top after staining. The grain has visually "popped" and a measured level of distress can be seen.
As you can see, to make properly, quite a few steps are involved in a "simple" top. Now a word about the pricing you see. The low number reflects this project as is, top only in Red Oak, 6/4" thick, low level of distress, stained and finished in low gloss lacquer. From there on up the sky is the limit and the options are endless.
Dimensions: 60" wide x 96" long